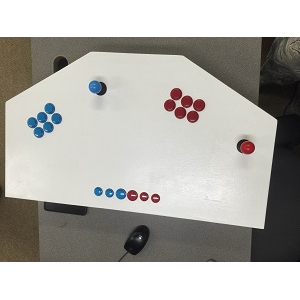
When I was approached by a customer who wanted me to build an arcade controller that was portable and capable of including whatever retro games they wanted to put on it, I was excited. A few years ago I designed and built a full-size arcade that currently sits in my living room. Since then, I have always wanted to try a smaller build that could accomplish the same thing. This was my chance. This write-up and video only cover the controller build. If you wish to build one yourself, there are many tutorials online that can tell you how to configure and use Retro Pi.
The Build Process:
I started by cutting out all of the pieces to the proper sizes and basically just guessed on the angles. The angle cuts did not need to be exact because the controller wound up being painted. On the top board, I cut out the holes for the buttons and the joysticks. In order to give the joysticks the most length possible, I raised the mounting surface by routing down the material until it was only about 1/4″ thick.


I then used regular wood glue to attach the top into place and held it in place with clamps until it was dry. One important step in this process was to fill all of the gaps. Standard wood putty worked well for this. Finally, I gave it three good coats of white paint. Then, subsequently, two coats of spray varnish.


For mounting the circuit board, I made some brackets out of an old cutting board. Whereas, the joysticks are just epoxied into place. All in all, the customer is very happy with the results! He sometimes even brings it to work and we all play for a while after hours.


Video of me build an arcade controller
I hope you enjoyed reading about this project. Head on over to my YouTube channel where you can watch all of my videos.
