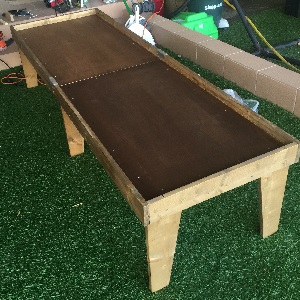
This DIY kids play table was very easy to build. I made it into two sections that screw together for easy transport in the future.
When I work on any project that has a specific surface area, I always cut that piece out first. This was no exception. I cut out the plywood tops and then framed them into place. The table top is 1/2″ plywood and the frame consists of 2×2 pieces of pine. Therefore, wood glue and screws are how I attach the top to the frame.


I was really proud of myself for coming up with the jig to cut the legs. I don’t have a miter sled for my table saw, so I screwed some scrap wood down to my work table and cut the angle that I wanted. By doing it this way, the cut was repeatable for all six legs of the table. They are held in place with glue and screws before the skirt is attached.


Finally, the skirt also gets affixed with glue and screws into its home. Like I said at the beginning of this article, this table was very easy to build. I am certain that even a beginner woodworker could complete this table without overwhelming themselves. The final picture shows how the customer setup the table. I really like how it turned out. I know for a fact that the kid loves it! When I delivered it to their house, he was so excited to have a table where he could play with his dinosaurs.


If you are wanting to see the full build, check out the video that I made for my YouTube Channel. I also have other creations that I have made posted on my channel. If you enjoy the content that I produce, please consider subscribing. Additionally, I have a Facebook page that you can follow.
