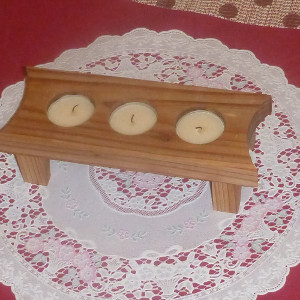
This is the write-up to accompany my YouTube video for making the tea light candle holder trio. I have the plans for this project in the free section of my site. To start out, I printed out the plans. I set my printer to print at 150% in order to get the proper dimensions. Transferring the pattern to the wood can be done in two ways. The easiest way is to just give it a quick spritz of spray adhesive and slap it on your work-piece. The method I tend to use when making more than one of the same pattern is to just trace it onto the wood by using contact paper. This allows me to reuse the same pattern over and over and reduces the amount of paper and ink I consume. Once the pattern was visible on my Japanese cedar, I trimmed it to the 3″ width with my table saw.
 The next step was to cut the individual parts out. I used a bandsaw for this, but a scroll saw could just as easily get the job done.
  After all of the main parts were cut out, I used a 1.5″ hole saw bit to hollow out where the tea light candles will eventually go. I would have preferred to use a forstner bit for this… but I don’t have one. Now that everything was cut and drilled, my Craftsman sander got a good workout. I don’t really care for sanding, but it is necessary.
  All of the pieces were then glued together and clamped according to the plans. I really liked the way the Japanese cedar looked, so I opted to just put a coat of boiled linseed oil instead of staining it.
 I really like the way it turned out, and I think that this tea light candle holder would look good displayed almost anywhere. If you enjoyed this build please go over to YouTube and give it a like. While you’re there go ahead and subscribe to my channel so you can be updated whenever I upload new project videos. If you have any comments or questions, post them below or send me an email.
Finished Tea Light Candle Holder

